|









|
Welcome to the Capital City Cruisers Website!
|
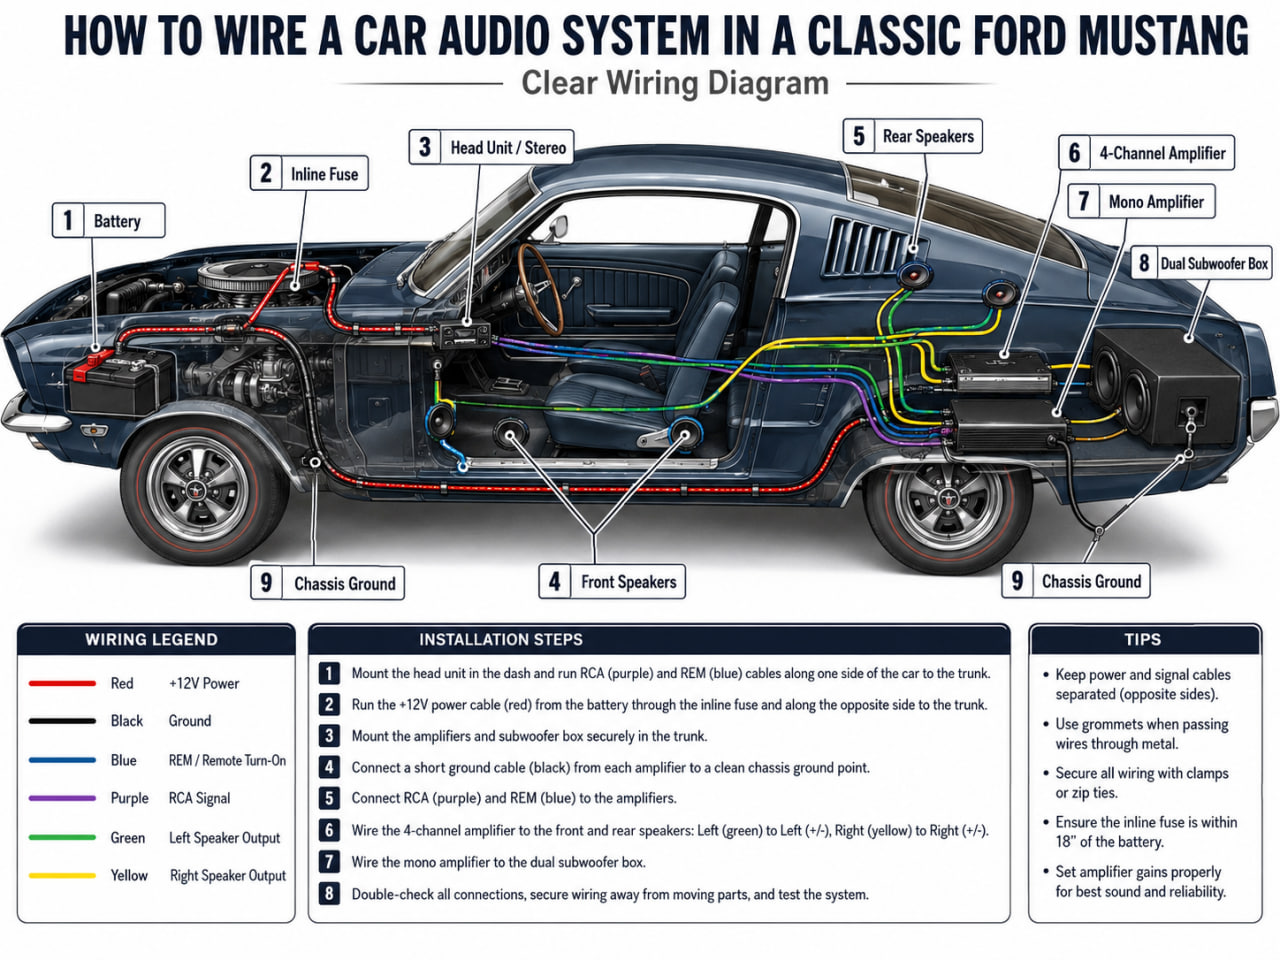
HOW - TO - WIRE - A - CAR - AUDIO - SYSTEM
How to Plan the System Before Wiring
A reliable car audio installation begins with a system plan, not with cutting wires. Decide whether the car needs a simple head-unit and speaker upgrade, a four-channel amplifier for the cabin, or a complete system with front components, rear speakers, a mono amplifier, and one or more subwoofers. The layout determines cable size, fuse rating, amplifier location, grounding points, and how much trim must be removed.
For most street cars, the best value comes from a strong front soundstage, a compact subwoofer, and enough amplifier power to play cleanly without distortion. Before buying equipment, check the alternator output, battery condition, available mounting depth, factory amplifier, steering-wheel controls, and whether the original radio is tied to climate or vehicle settings.
Recommended Car Audio Systems
Basic Daily-Driver Upgrade
Best for: clearer sound without major modification.
Modern head unit, quality front coaxial speakers, optional rear coaxials, vehicle-specific wiring harness, and basic door treatment.
Balanced Four-Speaker System
Best for: stronger volume and cleaner midrange.
Head unit with RCA outputs, front component speakers, rear coaxials, compact four-channel amplifier, and sound-deadening in the front doors.
Full System With Subwoofer
Best for: strong bass and controlled high volume.
Front components, optional rear fill, four-channel amplifier, mono amplifier, sealed or ported subwoofer, distribution block, and upgraded power wiring.
System Components and What They Do
| Component |
Purpose |
Recommended Choice |
Installation Note |
| Head Unit |
Controls sources, volume, equalization, crossovers, and signal output. |
Choose a unit with three RCA pre-outs, time alignment, and adjustable filters. |
Use a vehicle-specific harness instead of cutting the factory plug. |
| Front Speakers |
Create the main soundstage and carry most vocals and instruments. |
Component speakers with separate tweeters usually provide the best upgrade. |
Check mounting depth and use solid adapter rings. |
| Rear Speakers |
Add light cabin fill for rear passengers. |
Factory-size coaxial speakers are normally sufficient. |
Keep their level lower than the front stage. |
| Four-Channel Amplifier |
Provides clean power to front and rear speakers. |
Match RMS power closely to the speakers' continuous rating. |
Mount it where airflow is available and cables can be secured. |
| Mono Amplifier |
Powers one or more subwoofers efficiently. |
Match RMS output to the final subwoofer impedance. |
Verify that the amplifier is stable at the selected ohm load. |
| Subwoofer |
Reproduces low bass that door speakers cannot handle cleanly. |
A 10-inch sealed sub is compact; a 12-inch ported setup plays louder. |
The enclosure must match the driver's recommended air volume. |
| Power and Ground Cable |
Delivers current safely from the battery to the amplifiers. |
Use true copper cable sized for total current draw and cable length. |
Install the main fuse close to the battery. |
How to Wire the Head Unit
Disconnect the negative battery terminal before working. Remove the factory radio with the correct trim tools, identify the vehicle harness, and connect the aftermarket harness by function: constant 12-volt power, switched accessory power, ground, illumination, remote turn-on, and the four speaker pairs. Confirm uncertain circuits with a multimeter instead of trusting wire color alone.
Use crimp connectors, solder with heat-shrink, or a quality plug-and-play harness. If the car uses a factory amplifier, data bus, premium audio package, or steering-wheel controls, install the correct integration interface. Route RCA signal cables and the amplifier remote wire from the radio toward the amplifier location.
How to Run Amplifier Power Safely
Run the positive power cable from the battery through a protected factory grommet in the firewall. Install the main fuse within roughly 12 to 18 inches of the battery connection. Route the cable away from pedals, seat rails, sharp brackets, hot exhaust areas, and moving mechanisms.
For multiple amplifiers, use a fused distribution block. Ground each amplifier to clean bare chassis metal with the shortest practical cable, normally the same gauge as its positive cable. A poor ground is one of the most common causes of noise, voltage drop, overheating, and amplifier shutdown.
How to Connect Speakers and Subwoofers
Run new speaker cable from the amplifier when the factory wiring is too thin, damaged, or routed through an incompatible factory amplifier. Maintain correct polarity from amplifier positive to speaker positive and amplifier negative to speaker negative. Reversed polarity can weaken bass and blur the stereo image.
For a subwoofer, calculate the final impedance before connecting the voice coils. The final load must remain within the mono amplifier's rated operating range. Set the subwoofer low-pass filter near 70 to 90 Hz as a starting point and apply a similar high-pass filter to the door speakers.
Installation Difficulty, Time, and Value
| Upgrade |
Difficulty |
Typical Time |
What Is Hardest |
Is It Worth It? |
| Head Unit Only |
Easy to Moderate |
1-3 hours |
Dash removal, harness integration, steering-wheel controls, and data connections. |
Yes, especially for modern inputs, tuning, navigation, and RCA outputs. |
| Front Speaker Replacement |
Moderate |
2-4 hours |
Door-panel removal, mounting depth, adapter rings, tweeter placement, and moisture protection. |
Usually the best sound-quality upgrade per dollar. |
| Four-Channel Amplifier |
Moderate to Hard |
4-8 hours |
Power routing, grounding, RCA routing, speaker rewiring, and gain setup. |
Yes when factory or head-unit power cannot drive the speakers cleanly. |
| Powered Subwoofer |
Moderate |
3-6 hours |
Finding power, signal, remote turn-on, a ground point, and a secure location. |
Yes for compact cars and owners who want bass without a large enclosure. |
| Separate Mono Amp and Subwoofer |
Hard |
5-10 hours |
Impedance matching, enclosure choice, heavy cable routing, and tuning. |
Worth it for deeper bass, higher output, and future upgrade flexibility. |
| Full Multi-Amplifier System |
Very Hard |
12-30+ hours |
Electrical load, fabrication, cable management, noise prevention, and DSP tuning. |
Worth it for serious sound-quality or show builds, but excessive for many daily drivers. |
| Factory Premium-System Integration |
Hard to Very Hard |
6-16 hours |
OEM amplifier bypass, data-bus signals, active crossovers, equalization, and warning chimes. |
Worth it only with the correct interface or professional installation plan. |
Which Part Is the Hardest to Connect?
The most difficult part is usually not the speakers. In older cars, the challenge is safe cable routing through the firewall and doors without damaging trim or creating future electrical faults. In newer cars, the difficult part is integrating factory amplifiers, digital signals, warning chimes, steering-wheel controls, active crossovers, and vehicle data networks.
A simple radio and speaker replacement can be handled by a careful beginner. A multi-amplifier setup, factory premium-system bypass, or custom subwoofer enclosure requires more planning, test equipment, and fabrication skill. When airbags, hybrid high-voltage components, or complex vehicle networks are nearby, professional installation is the safer choice.
How to Tune the System
Turn loudness, bass boost, and aggressive equalizer settings off before setting gains. Set the head unit to a clean listening level, then raise each amplifier gain only until the system reaches the desired output without audible distortion. Gain is not a volume control.
Apply high-pass filters to door speakers, a low-pass filter to the subwoofer, and verify that left and right channels are connected correctly. Adjust subwoofer phase if bass weakens around the crossover point. Use time alignment and modest equalization only after speaker levels, polarity, and crossover points are correct.
Related Car Guides
Continue with these Capital City Cruisers articles about tuning, show preparation, performance upgrades, and choosing a classic project.
Classic Car Tuning
Performance and restoration guide
Plan safe engine, suspension, wheel, brake, exhaust, and interior upgrades for a classic build.
Read More
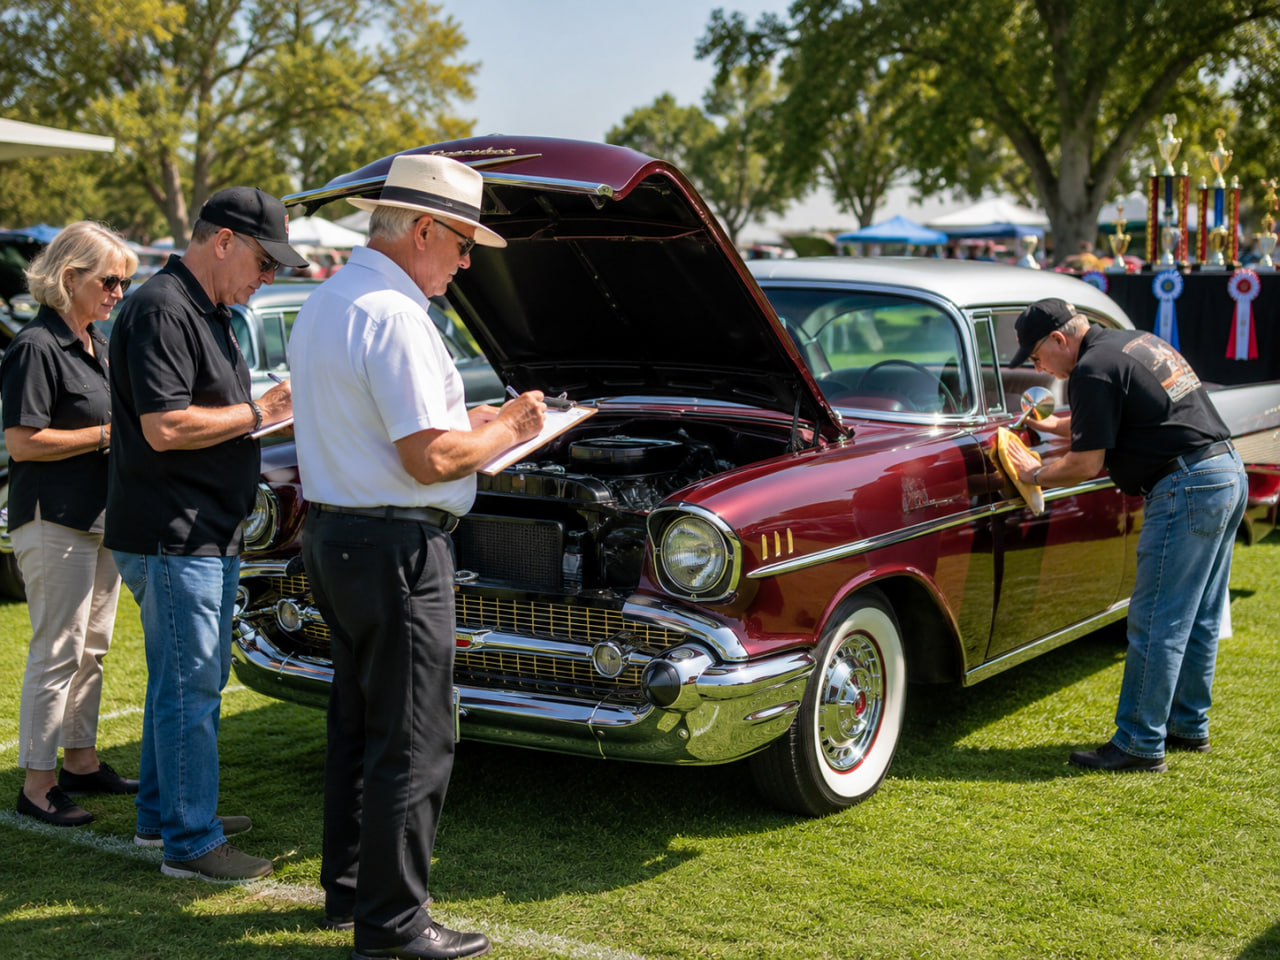
How Classic Car Shows Are Judged
Show preparation guide
Understand presentation, cleanliness, originality, craftsmanship, classes, scoring, and awards.
Read More
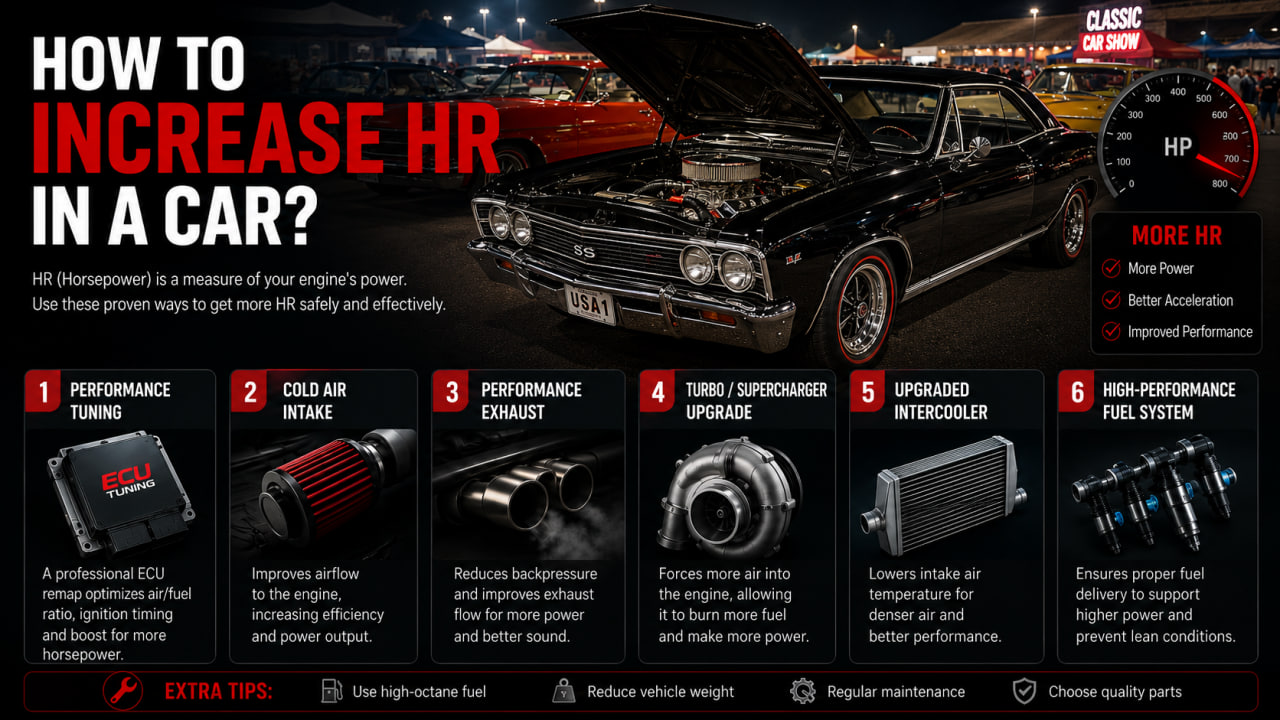
How to Increase HR in a Car?
Engine performance guide
Review maintenance, airflow, exhaust, fuel delivery, ECU tuning, cooling, and supporting upgrades.
Read More
Top Classic Cars
Collector and project guide
Compare iconic cruisers, muscle cars, trucks, restorations, and popular models for a custom audio project.
Read More
Frequently Asked Questions
Can I install a car audio system without replacing the factory radio?
Yes. A line-output converter, vehicle-specific integration interface, or DSP can take signal from the factory system and feed aftermarket amplifiers.
Should RCA cables and power cables be separated?
Separating them is good practice because it reduces the chance of induced noise, although correct grounding and quality signal routing matter just as much.
Do I need a bigger battery or alternator?
Not for every system. Moderate daily-driver systems often work with a healthy factory electrical system. High-power amplifiers may require upgraded charging cables, a stronger battery, or a higher-output alternator.
What is the best first upgrade?
For sound quality, start with front speakers and door treatment. For features, start with the head unit. For bass, add a properly powered subwoofer after the front stage is working correctly.
When should I use a professional installer?
Use a professional when the vehicle has a complex premium system, data-bus integration, active noise cancellation, hybrid high-voltage components, custom fabrication, or advanced DSP tuning.
|
 
Compare Insurance! Every Car Event...Everywhere!
Hope to see you soon...Drive On! PinCoin
|